Overhead Garage Door Security

A few years ago a Home Owners Association (HOA) I work for purchased a $6,000.00 pressure washer for cleaning their own side-walks and driveways. The pressure washer with it’s own water tank fit on a trailer and could easily be hitched to a car and towed to the job. The HOA was worried someone would hitch the trailer to a car and steal the unit as soon as no-one was looking. My job was to secure the garage where the pressure washer would be stored over night. I chose locks which had patent-protected keys so duplicate keys could not be made without someone’s knowledge. The locks were also pick resistant and drill resistant.

07 27 11 download 682

07 27 11 download 683

The challenge was securing the overhead door. In the past the only option for more security was to drill a hole through the roller track and insert a padlock through the hole blocking the door from lifting. Although this method is still effective, the padlock is often exposed to bolt cutters. I researched the locks available for overhead doors and discovered the Major “Garageblok.” The lock uses a hardened steel bolt, protective hardened sleeves and a protective padlock shield. The lock is made up of a, “tough armored 2 ¼ lb 3/16 inch steel housing, plated in zinc chromate.” The lock can be locked in the open or closed position. The Major “Garageblok” is handed for the right side or left side of the door. I locked both sides of the garage door for maximum security.

07 27 11 download 685

07 27 11 download 688

07 27 11 download 686

07 27 11 download 691

07 27 11 download 705

07 27 11 download 689

I reinforced the entry door with a wrap-a-round plate, steel strike box and Mul-T-Lock deadbolt. For convenience all three locks were opened with the same key.

07 27 11 download 700

07 27 11 download 696

07 27 11 download 702

Deadbolt Installed in Hollow Metal Door Requires Door Support

This blog is a continuation of my January 31st Blog titled, “Deadbolt Locks For Child Safety and Bedroom Privacy.” In the previous blog I demonstrated how Thumb-Turn Only (or one-sided) deadbolts could be installed high up on the door, preventing small children from running out the door unattended or opening the door to a stranger. The problem with these locks is someone inside can lock all the doors, if the spouse comes home from work at an unscheduled time entry will be impossible without ringing the door bell or calling the person inside with a cell phone. Mom might be napping with the kids and cannot be woke up easily. Dad has a key but cannot unlock the one-sided deadbolts because there is no key hole on the outside.

P1020608P1020611

I went through this experience with a customer many years ago and I had to return to re-install one lock which could be unlocked with a key. Since that time I have always recommended a contingency plan when one-sided deadbolts are getting installed. At least one of the deadbolts should have a keyhole on the outside so the spouse who is locked out can easily enter the house with their key without disturbing napping children.

The problem with installing deadbolt locks so high on a metal door is that most of the door is filled with Styrofoam. Most door manufacturers build solid wood cores where the locks are to be located, but it is very rare to find wood to support a lock installation the full height of the door. Many metal doors provide only enough wood inside the door to support a doorknob. I have installed many deadbolt locks 6 inches above the doorknob only to find the door filled with foam or cardboard. And I have removed many deadbolts to re-key a house for the new owner only to find the locksmith or carpenter never tightened the locks mounting screws because the door was filled with foam. Tightening the mounting screws would have crushed the door and caused the lock to bind.

P1010864P1010878

The correct procedure for installing a lock in a hollow metal door is to install a filler around the locks mounting hole. This can be made out of wood on site, but the easiest and most professional way is to use an Ames Door Support. The door support allows the new deadbolt mounting screws to be tightened down firmly so the lock is tight on the door. It also keeps the lock centered in the door where the lock will function smoothly without hanging up or binding.

P1010879P1010883P1010884P1010885P1010892P1010894P1010901

How To Install a Lever-lock with Existing Latch-Guard

The last piece of legislation signed into law by President George H. W. Bush in 1990 was the American Disabilities Act. This law changed many building codes to compensate for access of public places to disabled Americans. Existing buildings were not grandfathered in, but the law did allow private entities to install lever-locks on an as needed basis. The two hospitals I service were not required to replace all the existing door knobs immediately, but as hardware wore out a door knob was to be replaced with a lever-lock.

Recently I had to replace a door knob which was installed when a hospital was constructed back in 1982. The problem was a latch-guard was installed with the knob to prevent unauthorized access to someone with a pry tool or large screwdriver. The carriage bolts used to hold the latch-guard to the door were covered with many (possibly hundreds) layers of paint. The only way to remove the latch-guard from the door would be to cut the bolts off with a hack saw. The latch-guard was cut out to fit around the door knob. Lever-locks however have larger rosettes which house the lever return springs. The heavy springs used in these larger rosettes keep the lever in a horizontal position after many thousands of cycles. A typical Medication Room in a hospital could be opened as many as 80,000 times in 6 months. Grade 1 lever-locks are designed for this kind of heavy use.

My problem at the time was fitting a lever-lock onto a door when the existing latch-guard would not allow it to fit flush up against the door. Since removing the guard would create a royal mess I decided to cut away a piece of the guard to make room for the larger rosette. The following photos will explain how I used a simple technique to solve a complicated problem.

P1010342P1010339P1010346P1010344P1010348P1010349P1010350P1010351P1010359P1010353P1010355P1010356

Installing a Door Closer Using a Drop-Plate

The door closer was first invented about 100 years ago before there were any standards about door size and thickness. In the northern states the doors of dormitories, factories and schools would be propped open during the summer. On a breezy day it was common for a heavy door to slam shut without notice, causing harm to anyone standing in the doorway. The door closer was first invented as a device to slow down the door before it could slam shut on someone’s arm or leg or worse. Not long after, the door closer was re-invented to control the closing and opening speeds of doors used in public places. In short, the door closer is intended for life-safety. First to control the opening and closing speeds of the door, and second to insure a Fire Door in any building stairwell will self-close and self-latch. Thus cutting off a draft which could help fuel and spread a fire.

P1020215P1020216P1020213

The door closer in this blog was installed at the request of a receptionist who became tired of patrons slamming the door shut, or leaving the door open and letting all the air-conditioning escape. The problem to overcome was the molding around the glass. On normal store front type doors which are 80% glass a drop-plate is used for mounting the door closer. On this particular door I had to fabricate a spacer to compensate for the molding around the glass. The molding was about ½ inch higher than the door surface.

P1020217P1020222

After taking some measurements the spacers were clamped to the drop-plate and holes were drilled through the spacers. Then the whole assembly was fastened to the door using through bolts. Through bolts are threaded metal sleeves which are pressed through a hollow door from the outside. The hardware is held to the door on the inside using machine screws which thread into the through bolts.

P1020227P1020228

Many hotels use spring hinges to insure the room doors close and latch to contain a possible fire. Spring hinges meet code and are much less expensive than a door closer.

Antique (ancient) Italian Key Operated Safe Lock Out

Recently I was asked to open a safe when the customer had all the keys and instructions for use at their disposal. The safe did not only open with keys however, there were custom made tools which had to used in a specific order before the keys would work. The safe was built around the late 1700’s, about 100 years before Linus Yale Jr. invented the pin tumbler lock. Security devices were not only based on having the correct key, but also having the knowledge of how to work the key.

P1010964P1010966

The safe was made in Italy and the hand written instructions for opening the safe were in Italian. The instructions were translated word-for-word, but what exactly the words were describing was another challenge.

P1010965P1010966 - Copy

My first attempt to unlock the safe was unsuccessful. To me it appeared something was jammed. The key would rotate clock-wise and counter clock-wise and never come to a dead stop. I fabricated my own tool for grabbing the bolt and pulling it into the door. But the bolt was solid, no wiggle room, no tolerance or play, something had to be wrong.

I posted photos of the safe with keys and tools on a technicians website and explained I was planning on drilling on my next visit. The experience and insights of safe technicians from all over the world told me I had everything I needed to open the safe, I just needed to know where and how to use the tools and in the proper sequence. I was told quite sternly it would be criminal to drill such an antique work of engineering marvel. I agreed, I did not really want to drill this beautiful piece of craftsmanship.

On the second trip I worked with the translator to figure out what the writer of the instructions intended to mean when he said, ”enter the tool through the slit,” when there was no slit to be found. After 90 minutes we had figured out the secrets and the door was unlocked.

This was probably a once in a life time job for me. But this is why I love being a locksmith. Everyday there is something new to learn or a new challenge to figure out. Enjoy the photos!

P1010936 - CopyP1010928P1010930P1010949P1010952 - CopyP1010958P1010959

Deadbolt Locks for Child Safety and Bedroom Privacy

Over the years I have been called out to homes many times because a child (or children) has figured out how to unlock the front door and venture outside without supervision. I’m talking about children between the ages of 2 and 6 years old. This can be very frustrating for the parent who is trying to clean or bake or just relax during the day, only to discover junior playing near the street during a spot check. In an ideal world children are supposed to stay magnified to the TV or video so adults can be productive with their time. Children however seldom do what we expect in the ideal world. In the real world watching or supervising children can be exhausting and unrealistic, yet it only takes a few minutes for an unsupervised child to get into trouble.

The “Thumb-turn only” deadbolt has been the answer for many parents. The deadbolt can be installed high enough where small children cannot reach, yet an adult can unlock the door in less than a second. The hole for the lock is not bored all the way through the door, so there is no key cylinder way up high on the door looking out of place and disturbing the balanced symmetrical look of the existing hardware.

 P1010833

P1010834

P1010851

P1010853P1010839P1010843

If you decide to install Thumb-turn only deadbolts on every door be mindful at least one door leading into the house must be unlockable with a key from the outside. I learned this from a customer who locked her husband out of the house. The husband had a key, but it was useless for a lock with no keyhole. I had to return and install a key locking deadbolt in the door most likely used to enter the home after work.

P1010842P1010845

The other reason for the Thumb-turn only deadbolt is to add a little extra security and privacy to a bedroom door. Since bedroom doors are usually thin 1 3/8 inches thick, the door would not last long were someone to kick the door down. The deadbolt would offer little resistance, but it would let you know someone is breaking-in. The deadbolt does offer excellent privacy because unlike the traditional privacy knob or lever, there is nothing to pick or manipulate to get the door unlocked.

P1010849

P1010856

I remember one customer was separated from her husband, but they were still living in the same house. The woman wanted a deadbolt installed on the bedroom door, but I refused the job. I informed her there is nothing which would enrage her husband more than to install a key locking deadbolt on the bedroom. The husband may just kick-in the door to show he cannot be locked out. I did install the thumb-turn deadbolt so the wife could feel some security while she was home. I installed a key locking door knob for her to lock while she was not home. Since there was no keyhole for the husband to see on the deadbolt lock, the reason to become enraged was removed.

P1010857P1010858

Safes Can Protect Your Valuables

Over the years as one who sells security and “piece-of-mind” for a living, I have heard more than a couple dozen times the phrase: “locks are only for honest people, if they want to really get in you cannot stop them.”

Another locksmith said something similar: “Given the correct tools, time and knowledge, there is nothing that cannot be broken into.” Time is the key part of any break-in. Enough time is needed to execute the crime and escape without detection.

I have been in many homes after a burglary. Usually the police are on site gathering evidence and making a report of when the crime could have occurred, how the burglars broke-in, and what was taken. My job is to change the locks to a different key because a set of keys was stolen. Often I need to repair the door frame and door and install better deadbolt locks. The home is usually a mess, no drawer or cabinet is left untouched. The bed is torn apart also, all with the intent of finding that golden hiding place where, “no one would think to look.”

P1010066

This past year I had the pleasure of working for three customers whose loses were greatly minimized because most of their valuables were stored in a safe. Each safe was attacked violently, but kept the contents secure. The safes kept the dishonest creeps out and saved the owners many thousands of dollars, not to mention all the head-aches of dealing with insurance companies. Two of the safes had special order products or jewelry left for repair. Imagine telling a customer their precious family heirloom was stolen because thieves broke into your store and took everything. In these three cases the thieves were STOPPED, and the loses were reduced to TV sets and other electronic devices which can easily be replaced.

P1010611

P1010612

P1010636

One customer had a home fire safe purchased at a “big box” store. Surprisingly the thugs could not break into the safe, even after peeling the face of the door off. The customer was smart enough to bolt the safe down so it could not be carried away. Plus the safe was tucked away in an odd closet. My guess is the crooks did not find the safe until they were leaving. They did not have enough time to finish the job and the safe more than paid for itself by staying sealed even while under heavy abuse.

P1090816

This year take measures to protect your valuables with a real security container. The best safe is the one nobody knows you have. Keep the safe a secret, keep it hidden and bolt it down if the weight is under 500 pounds. Gun safes are not for protecting valuables like expensive jewelry, but they are better than nothing. Consult a safe specialist like myself or someone in your community for the safe which will best meet your needs.

Office Furniture Key Making

One of the less-glamorous jobs for the locksmith is making keys for file cabinets, desks and credenzas. Most of this work is accomplished by using the key code stamped on the face of the lock. With the technology available today a locksmith can use a Code Program on his/her computer or tablet and figure out how to cut a key for most key codes found on office furniture, padlocks and utility boxes found on the back of trucks. When I was doing automotive locksmith work almost all the keys were cut using a key code. The trade secret and sometimes the challenge was finding the key code location. Many cars however had replaced locks or no available key codes. In those circumstances the locksmith has to make a key by disassembling the lock, or replacing the lock.

Disassembling office furniture can be a nightmare of a job. Many desk locks are simple to remove, but when one key lock is used to lock and unlock several drawers the linkage in the desk can become complex. Making a desk or file cabinet key without taking anything apart is always the desired path for the locksmith.

P1010483

P1010482

P1010522

P1010523

P1010527

When a key code is unpublished or unavailable locksmiths use two methods for making the key. First, the correct key blank must be selected. Looking into the keyhole and knowing which blank to choose is the first challenge. Once the correct key is discovered the next challenge is knowing how to cut the key so it will turn in the lock. Some locksmiths prefer to use an otoscope with a probe attached. This scope is commonly used by a doctor to look in nose holes and ears. The scope is magnified and helps the locksmith identify the size difference between the tumblers in the lock. The probe is used to push down the tumblers. As the probed is dragged out of the keyhole slowly the tumblers pop-up one at a time. By examining the tumbler sizes the locksmith can reckon how the key should be cut to operate the lock. This method is called reading the tumblers.

The next method is called making a key by impression. This method involves wiggling the correct key blank in the keyhole. Inspection of the key will reveal marks. Some of these marks are dirt, some are the locks tumblers digging-in, or making an impression in the key blade. The experienced locksmith knows how to interpret the marks and hand file the cuts into the key blank until the key turns in the lock.

P1010487

P1010488

P1010499

P1010502

P1010501

P1010500

P1010506

Some office furniture uses flat steel keys. It is not common to read the tumblers or make an impression of a flat steel key. Usually these locks must be removed from the furniture before a key can be made.

Protecting Government Secrets

In 1949 President Harry Truman consolidated several government agencies into the General Services Administration (GSA). In 1953 President Eisenhower signed an executive order specifying the parameters and requirements for containers protecting Top Secret material. One of these requirements was the container be insulated and protect papers during a fire. Herring-Hall-Marvin built and sold the first GSA-approved security containers to the US Government in 1955. In 1961 President Kennedy removed the fire protection requirement for containers storing Top Secret material. (a)

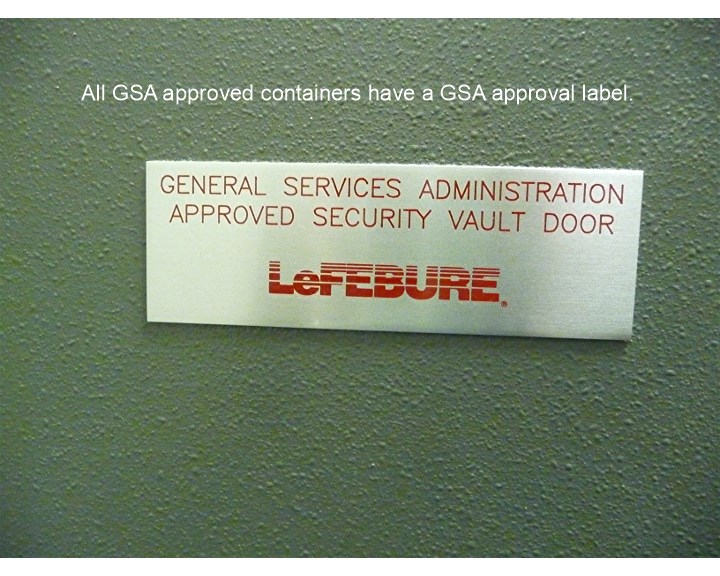
GSA-approved containers are built to deter and detect access of Classified, Secret and Top Secret material against unauthorized persons. The purpose of the GSA container is to show evidence someone broke in and stole government secrets. The time of the break-in can be narrowed down, video surveillance can be reviewed and possibly a suspect apprehended. More importantly undercover agents whose cover may be revealed can be pulled from the field and out of harms way. The worst possible situation is a surreptitious break-in where secrets are stolen but no evidence is detected.

IMG_0318

P1080414

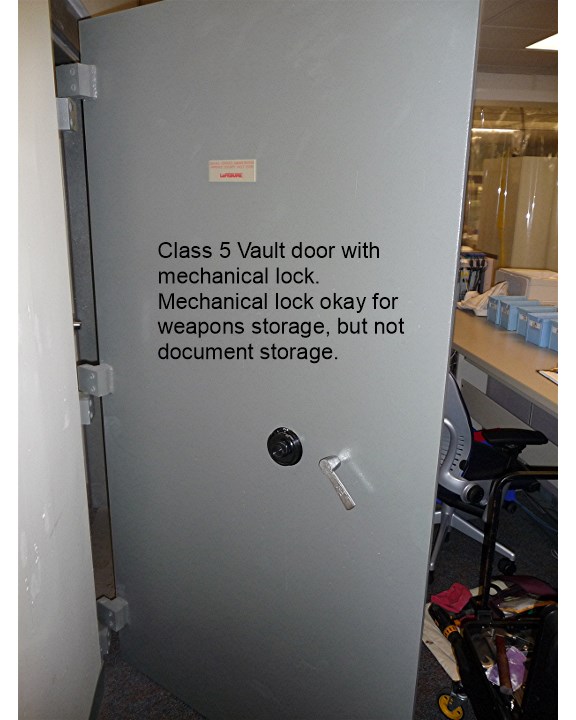
There are 8 GSA Classes. The class number has no bearing on the protection provided, but rather the order in which the class was specified by the US Government. Class 1 and 2 were the only containers insulated against fire. The fire protection requirement may have been lifted because the government would rather lose secret documents than have them preserved only to fall into unauthorized or enemy hands. Currently only Class 5 and 6 containers and vault doors are being manufactured.

The protection requirements for a Class 5 containers is:

20 man-hours against surreptitious entry

30 man minutes against covert entry

10 man-minutes against forced entry

The protection requirements for a Class 6 container is:

20 man-hours against surreptitious entry

30 man-minutes against covert entry

No forced entry requirement

Forced entry is self descriptive, covert entry is a type of entry only detected when the lock or container is inspected. Drilling open the lock and re-installing the dial is an example of a covert entry. The container looks okay until someone tries to use the lock.  Surreptitious entry is an undetected breach in security and leaves no evidence.

New Pict 070

New Pict 071

P1010290

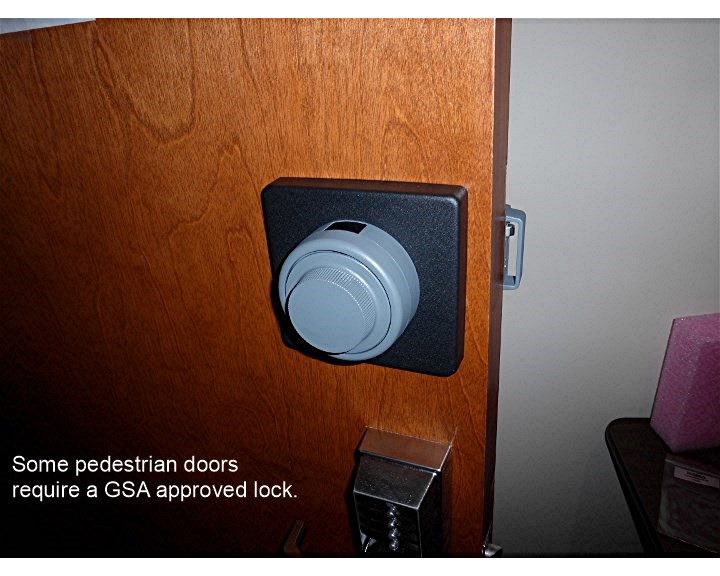
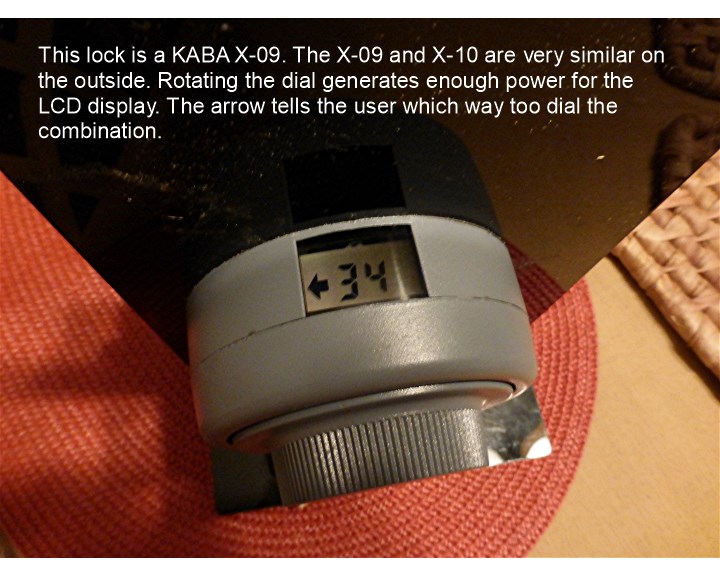
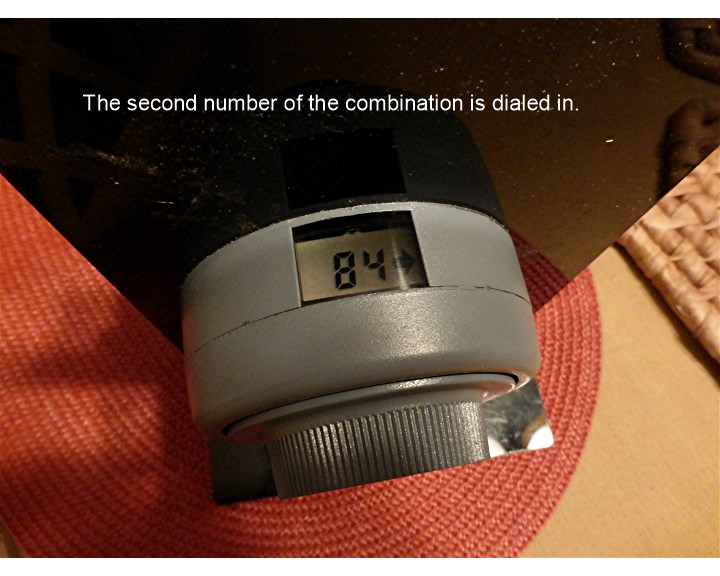
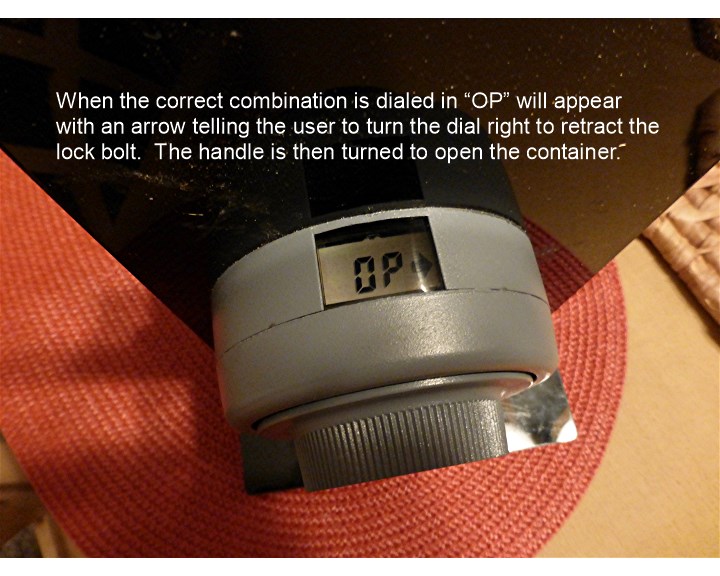
The heart of the GSA containers security is the lock. GSA-approved locks must be self-powered, manipulation resistant and x-ray resistant for 20 man hours. There are 2 approved locks currently manufactured for GSA containers, the S&G 2740B and the KABA X-10 (formally the X-09). The more popular lock between the 2 is the KABA X-10. The X-10 uses a self-contained generator. When the dial is turned the lock powers-up and numbers appear in the LCD display. Unlike traditional safe locks the user does not need to count 4 times left, 3 times right,etc until the lock opens. The X-10 user dials left direct to the first number of the combination, then right to the next number, left to the last number and right to “OP” which appears in the LCD when the lock is open. The only way to open a GSA approved lock is to know the combination. Sometimes employees leave or the containers are moved to new locations. Combinations can become lost. In this case the container must be drilled open and the lock replaced. There is no “back door” override combination on GSA-approved safe locks. Drilling a GSA container requires special drilling equipment, even then the process can take several hours to make one hole. The container must be repaired according to GSA regulations to maintain GSA-approval.

P1010362

P1010363

P1010364

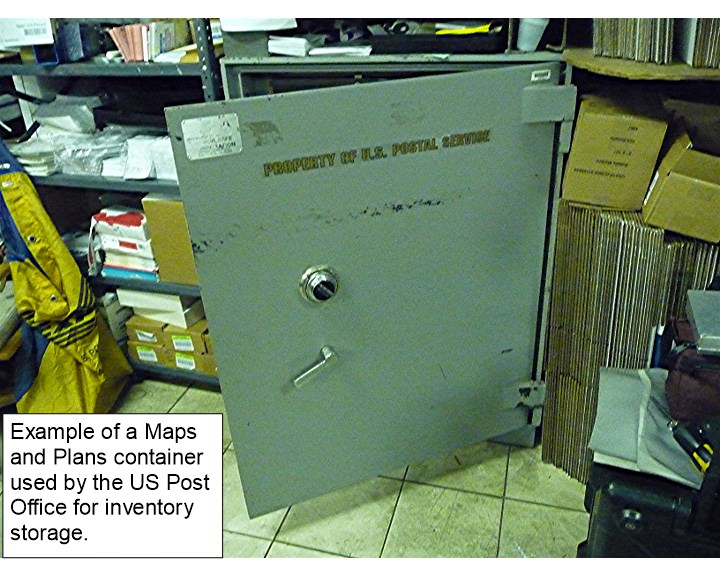
The GSA authorizes file cabinet type containers, different sizes of safes called Maps and Plans containers, Vault Doors and special type safes called Information Processing System Storage (IPS Containers).

The Pentagon uses 30,000+ GSA containers, along with Department of Defense Contractors and many other government agencies. Usually the GSA container is also protected by Intrusion Detection Equipment and armed guard inspections depending on the sensitivity of the documents being stored.

(a) GSA Container Identification by A. Dennison & J. Cortie; Copyright 2009

Converting Door Knobs to Levers

At least once a year I am called to do the almost impossible job. One year I was called to a home the customer had just purchased. The interior decorator recommended all the door knobs be replaced with decorative levers. The existing hardware had the brand name “Nostalgic.” I have worked with many brands of decorative hardware, but I never heard of Nostalgic.

07 27 11 download 463

I did an internet search and found the companies website, but at the time their offerings were minimal and no lever could be found to satisfy the customer. The customer liked a lever design by Baldwin. The problem was the Baldwin lever would not fit on the Nostalgic escutcheon plate. Plus using a Baldwin lever would mean a different spindle size, which would require using Baldwin latches.

07 27 11 download 053

I gathered the hardware I needed and figured out a plan for getting the Baldwin lever to work with the Nostalgic escutcheon plate. I installed the hardware on a door at my office and emailed a photo to the customer. The hardware was approved and I ordered everything I would need to finish the customer’s first floor. From start to finish the whole job took about 3 months to complete. About a year later I converted all the knobs on the second floor to levers as well.

 07 27 11 download 431

07 27 11 download 465

07 27 11 download 437

07 27 11 download 440

07 27 11 download 442

07 27 11 download 476

07 27 11 download 480

07 27 11 download 446

07 27 11 download 484

07 27 11 download 494

07 27 11 download 497

10 12 11 download 200